5. Initial instrument operation
Completing all front and back panel connections, the following procedures need for initial use to connect Electrochemical Analyzer or potentiostats
1. Push rear panel power switch to the ON (“|”) position.
2. Tighten motor shaft assembly onto stainless steel cell holder.
3. Remove the electrode by holding the screw and turning the
electrode body counterclockwise.
4. Polish the electrode by following the instructions in the
Polishing Kit (PK-3 kit). See Chapter 7 for more information.
5. Replace the electrode (See chapter 7). Note that a slight
upward pressure must be applied to the electrode body to start the
threads. When the electrode is replaced with another working
electrode, the power switch should be turn "OFF".
6. Place a test solution in the cell vial. A common test solution
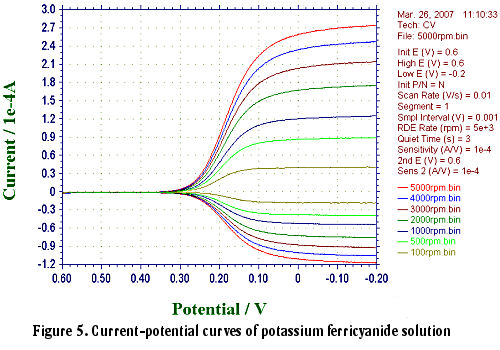
is 1 mM potassium ferricyanide in 1 M KCl.
7. Place the reference and counter electrodes inside two holes of
the teflon holder and attach the cell leads. Start purging the
solution with inert gas as described previously. For this initial
experiment, purging 5-10 minutes will be adequate. Please regulate
gas pressure carefully.
8. If the RDE is being used with the potentiostats, the control
of the rotation rate is able to control manually from the front
panel or remotely via TTL CONTROL using the potentiostats software.
9. The instrument is ready to use. Now the electrode will begin
to spin when the RUN command is initiated in the software.
10. After the experimental run, the motor shaft assembly can be
raised and the electrodes can be rinsed or polished as needed. The
system is then ready for the next experiment.
Typical test parameters are:
Working electrode : 4 mm Platinum electrode
Reference electrode: Ag/AgCl
Counter electrode : Platinum wire
Test solution : 0.5 mM Ferricyanide/1 M KCl
Initial voltage : +500 mV
Final voltage : 0 mV
Scan Rate (Volt) : 10 mV/S
Rotation Rate : 100 to 5,000 rpm
Sensitivity : 10-5
 |